
We are going to create the effect on the following layouts:
Step #1: Create The Section
Let’s add a section to place the cards:
- Add a section and then add 3 inner containers inside the section container for the cards and set up flex controls for a row layout
- Label the 3 inner containers, ‘Container – Card’
Step #2: Create The Cards
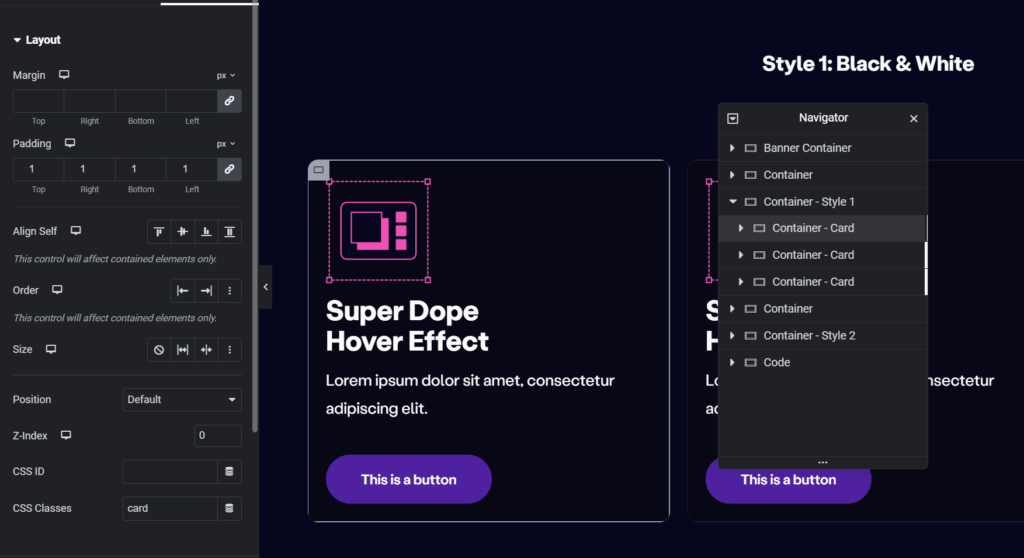
- Inside the containers called ‘Container – Card’ add a class ‘card’
- Add 1-3px padding – The padding will act as the border width
- Set z-index to 0
- Set overflow to hidden
- Style your card’s border radius and background color. Note, the background color will also be the border color when not hovered on.
Step #3: Create The Inner Container For Content
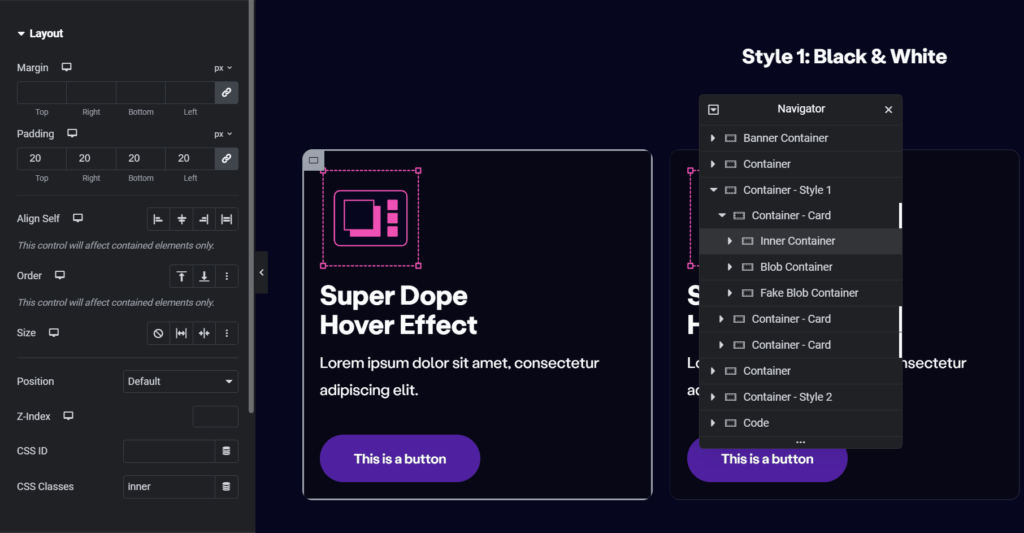
- Add a new inner container inside the Card container
- Label the inner container as ‘Inner Container’ (optional)
- Give the inner container a class name ‘inner’
- Add your content inside the ‘Inner’ container and style it with flex settings including your inner paddings and gaps.
- Set border radius (must be the same as border radius set inside the Card container)
- Set background color to .8 opacity
- Set background hover color to .6 opacity – You can adjust the opacity to lighten or darken your hover effect
Step #4: Create The Effect Elements
- Add 2 more containers inside your Card container
- Label the first container as ‘Blob Container’ (Optional)
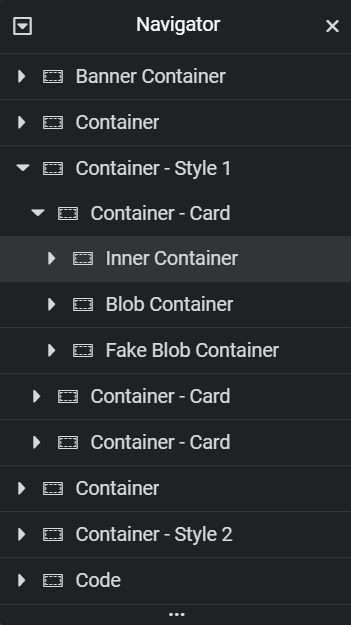
- Label the second container as ‘Fake Blob Container’ (Optional)
- Your container structure should show 3 inner containers stacked inside your ‘Card’ container in the order – ‘Inner Container’ > ‘Blob Container’ > ‘Fake Blob Container’ – See image above
- Give the Blob Container a class ‘blob’
- Give the Fake Blob Container a class ‘fakeblob’
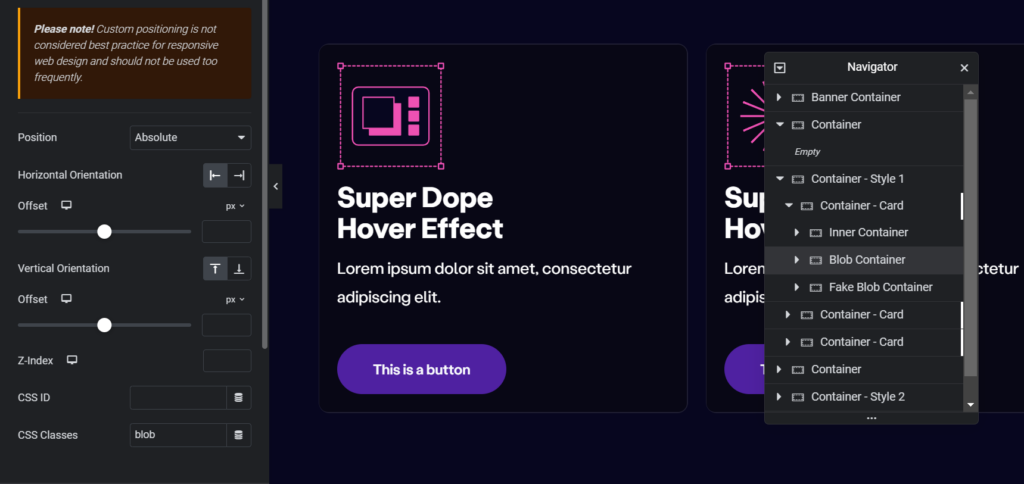
- In both the ‘Blob’ and ‘Fake Blob’ Containers, set the position to absolute and the border radius to 50% all around
- In the Blob container, choose your hover color by setting the background color. This will be the color of the Glow Effect.
- In the Blob container remove the 0 from the horizontal and vertical orientation offset and leave the field blank – See image below.
Step #5: Add the CSS
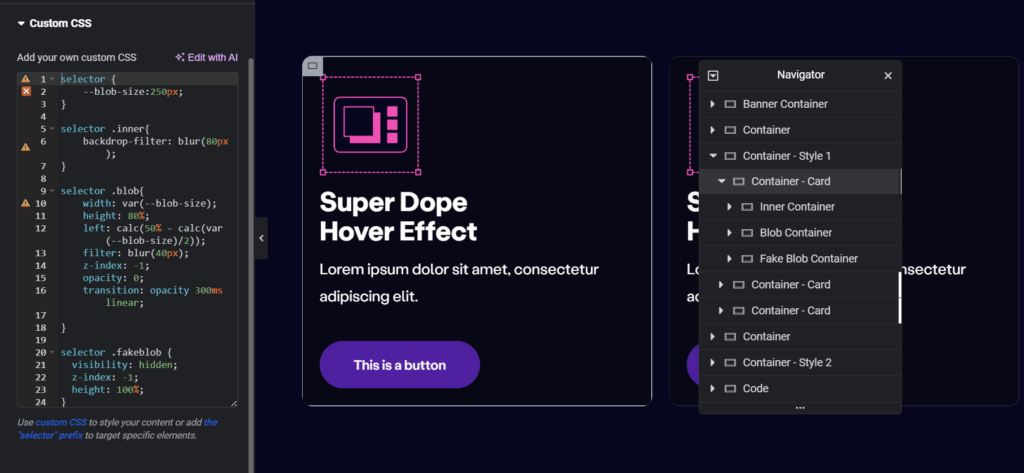
The CSS code stores the blob size in a variable, called –blob-size, so that it can be used in multiple places without changing or adding the value every time.
The lighting effect is created using the backdrop filter property by adding a blur. This property creates a graphical error to the background.
The Blob has a Z-index of -1, which puts it below the card (the card has a Z-index of 0). The card has a dark color with 20% opacity, and the blob has a white color, so when the blob becomes visible, combined with the blur effect, it creates an illuminating effect behind the cursor. The blob element is also hidden with the opacity property set to 0, as we only want it to appear on mouse hover over the card. The property left: calc(50% – calc(var(–blob-size)/2)) positions the blob element to the center.
The Fake Blob is used for position reference of the Blob to assist in moving it with the cursor.
Add the following CSS code snippet to each of the card containers:
/* css goes in .card */

selector {
    --blob-size:250px;
}

selector .inner{
    backdrop-filter: blur(80px);
    height: 100%;
}

selector .blob{
    width: var(--blob-size);
    height: 80%;
    left: calc(50% - calc(var(--blob-size)/2));
    filter: blur(40px);
    z-index: -1;
    opacity: 0;
    transition: opacity 300ms 300ms linear;

}

selector .fakeblob {
  visibility: hidden;
  z-index: -1;
  height: 100%;
}
Step #6: Add the JavaScript
In the JS code, we first select all the elements with the “card” class and store them in a const.
We then add an event listener to listen for mouse movement over any card. For each time, a mouse cursor is moved over a card, it selects the blob, the fblob, tracks the position of the fblob, and sets the opacity of the blob to 1, thus making it visible.
Then we add the animate method to translate, i.e., move the blob element with the cursor, setting the duration t be 300ms.
You can add the JavaScript code to Elementor custom code, or simply add a section on the same page, and use the HTML widget to add the code.
Here is the JavaScript Code:
<script type="text/javascript">

      const cards = document.querySelectorAll(".card");


window.addEventListener("mousemove", (ev) => {

  cards.forEach((e) => {
    const blob = e.querySelector(".blob");
    const fblob = e.querySelector(".fakeblob");
    const rec = fblob.getBoundingClientRect();


    blob.animate(
      [
        {
          transform: `translate(${
            (ev.clientX - rec.left) - (rec.width / 2)
          }px,${(ev.clientY - rec.top) - (rec.height / 2)}px)`
        }
      ],
      {
        duration: 300,
        fill: "forwards"
      }
    );

    blob.style.opacity = "1";

  });

});


</script>
Quick Tips
- To change the color of the glow effect, change the background color of the blob container
- To make the effect color lighter, increase the opacity of the hover color of the background of the inner container.
- To make the effect color brighter, decrease the opacity of the hover color of the background of the inner container.
- To add a border, adjust the padding of the card container.
Here is a YouTube video for a guided tutorial: