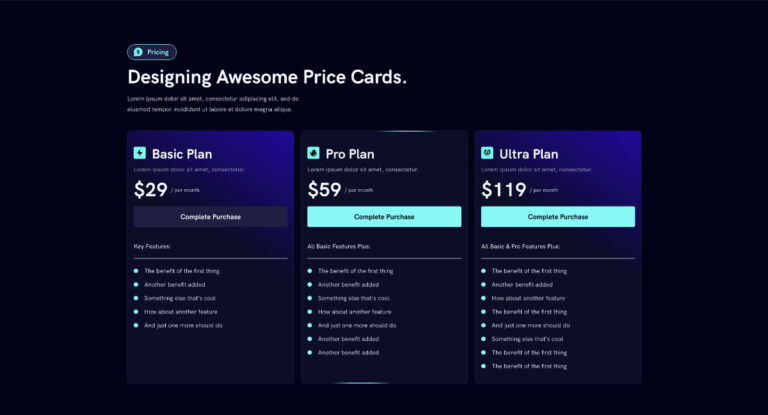
Have you ever faced a situation where you had to add category and tag filters to your website, but did not have an easy way to do so? Most of the time it would require an additional plugin or adding custom code. Let us know in the comments what methods you used for your sites.
The good news is that adding category and tag filters has now been made quite easy using the new Elementor Taxonomy widget. In this article we are going to discuss how to set up the taxonomy widget to display category and tag filters like this:

What are category/tag filters and why should we use them?
As we use categories and tags in our WordPress posts and WooCommerce products, it is essential to allow users/customers to filter through posts or products which fall into the category they want. This improves the user’s experience.
How to enable the Taxonomy filter widget in Elementor settings
We need to enable a few things under Elementor settings in order for the Taxonomy filter widget to work.
Navigate to Elementor settings in the WordPress dashboard, and click on Features.
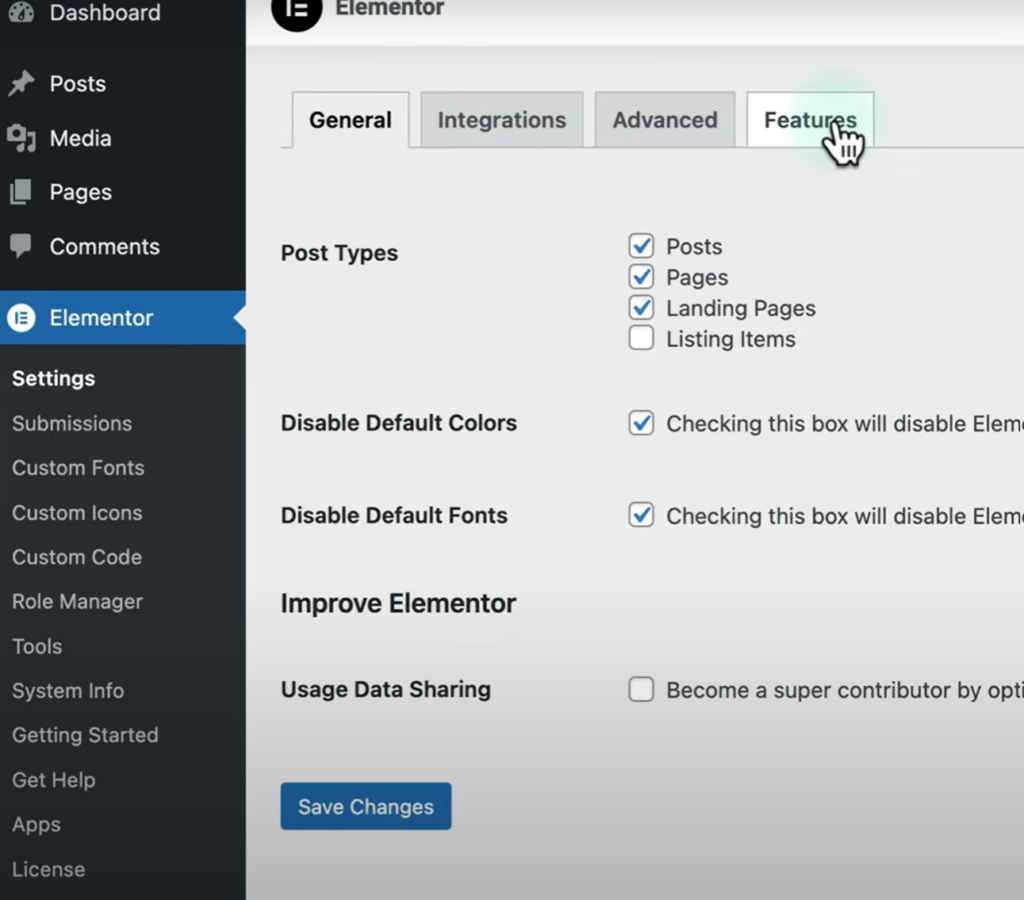
Under the Features tab, we need to make sure the following settings are activated:
1. Flexbox Container
2. Taxonomy Filter
3. Loop
Note: The Taxonomy filter is still in Beta mode, but we haven’t found any bugs in it, yet. However, it only works with the Loop Builder, which is what we will use to build our archive.
If you do not know how to use the Loop Builder/Grid, you may watch this video:
How to set up Category or Tag Filters using Elementor Taxonomy widget
Open the Archive template that you are using for posts/products. This template should be built using Loop Grid. Type in “Taxonomy” in the Elementor widget search bar, and drag and drop the Taxonomy widget where you want to place the Category filter on your page.
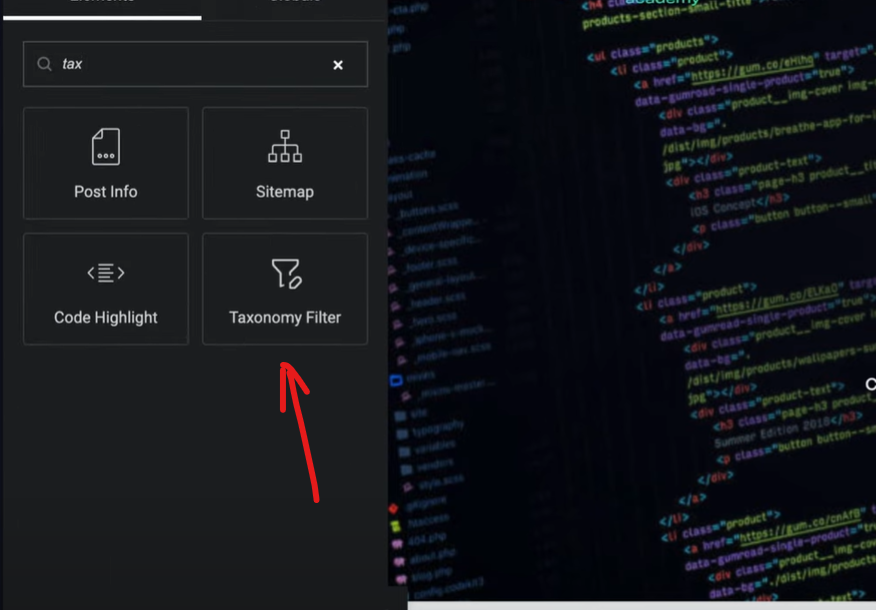
Once the widget is in place, you have to select the loop grid from the left panel.
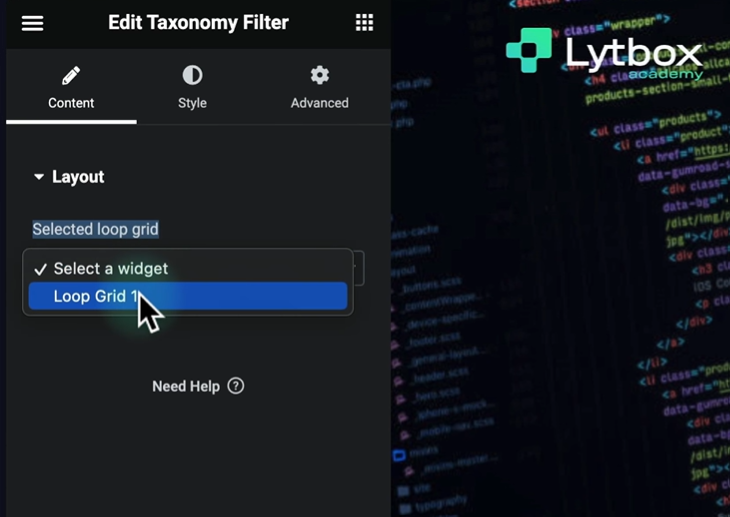
Next, you have to select if you want to use this filter for Categories or tags.
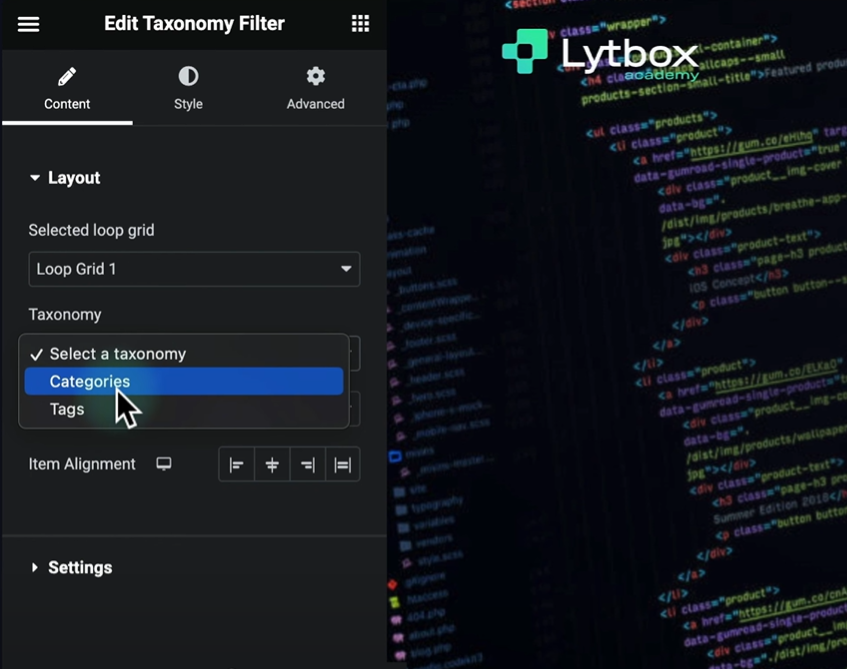
Once selected, you will see all the categories being listed, horizontally by default. You can change the direction to vertical by simply selecting Vertical from the Direction dropdown option. The vertical direction is good for creating side-by-side layouts where the Loop Grid resides beside the Category filter. Next, you can choose alignment, you may set it to left, right, centre or stretch according to your requirement.
You can change both alignment and direction in responsive mode, in order to adjust with smaller screens.
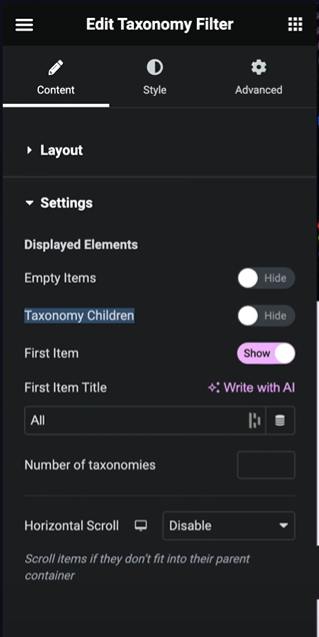
Next, we move to the settings tab. We have a few under this setting:
1. Empty Items: If you want to display the default categories (uncategorized) or categories with no items then you may turn this option on. However, it’s best to turn it off as it does not serve any purpose.
2. Taxonomy Children: You may enable this option if your Categories have children categories.
3. First Item: This option basically refers to the ALL option. It’s good practice to keep this turned on so users can view all items if they want to. You can change the text under the First Item Title option.
4. Number of Taxonomies: This option allows you to limit the number of taxonomies that will be displayed.
5. Horizontal Scroll: This option becomes very useful in mobile. It allows users to scroll through the categories left or right when they overflow from the screen.
Conclusion
And there you go, you have successfully set up category filters for your posts using the Elementor Taxonomy widget. To build a Tags filter, simply select Tags from the taxonomy dropdown. You can design the filter from the style tab as always.
Watch Jeffrey style up the filters to look really cool in this video:


