What is a Thank You Page Redirect?
Have you filled out a contact form or subscribed to a newsletter, and after you hit the send button, you got sent to a cool thank you page? It makes such a better experience. Far better than the default ‘Form was successfully sent.’ You know, that boring little line of text below the form that is usually too small to read.
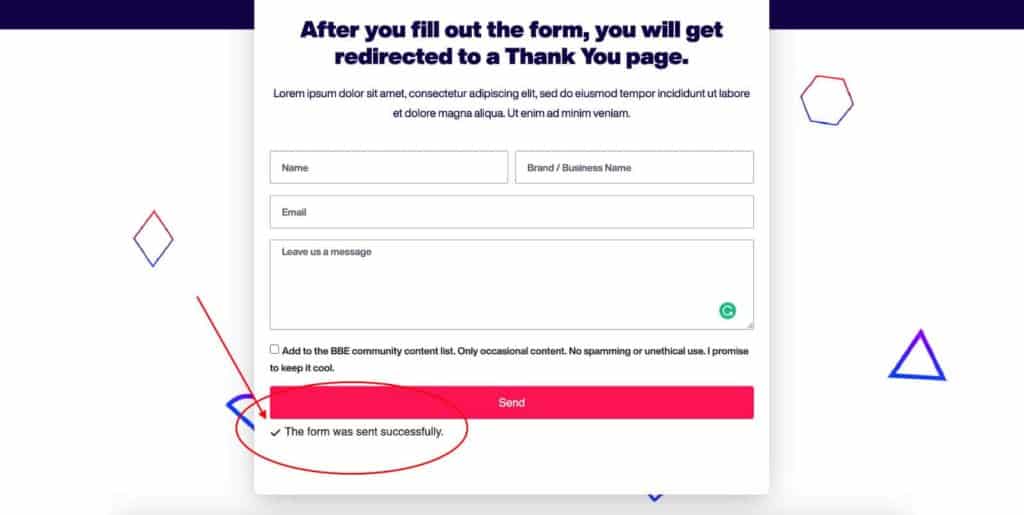
A Thank You page redirect is when a website visitor fills out a contact form or subscribes to a newsletter. After they hit the send or submit button, they are automatically sent to another page that says ‘Thank You for filling out our form.’
Using Elementor Forms
Doing this is actually very simple with Elementor forms, and the feature is already built-in. You do not need any additional plugins nor any custom coding. But you will need Elementor Pro to have access to their forms. Here is a link to the pro version of Elementor.
In this article, I will show you step-by-step how to do this. And it is ridiculously easy with Elementor! And in case you prefer video tutorials, here is a simple walkthrough video and more content on redirecting Elementor forms to Thank You pages.
Step 1: Creating a Thank You Page
The first step is to add a new page to your WordPress website and call it ‘Thank You.’ You can style up your page as you like. The good thing about Thank You pages and Elementor, you can make this very simple and take just a couple of minutes. Below are a couple of examples of a few Thank You page layouts. Feel free to get creative, but keep it simple.


Remember, the goal of a Thank You page is to thank your website visitors and let them know you received their message. Best to keep it simple.
Step 2: Create a Redirect in Your Elementor Form
Navigate to your form, and under the Content tab in the form editor, select ‘Actions After Submit.’ Click on ‘Add Action’ and select ‘Redirect.’
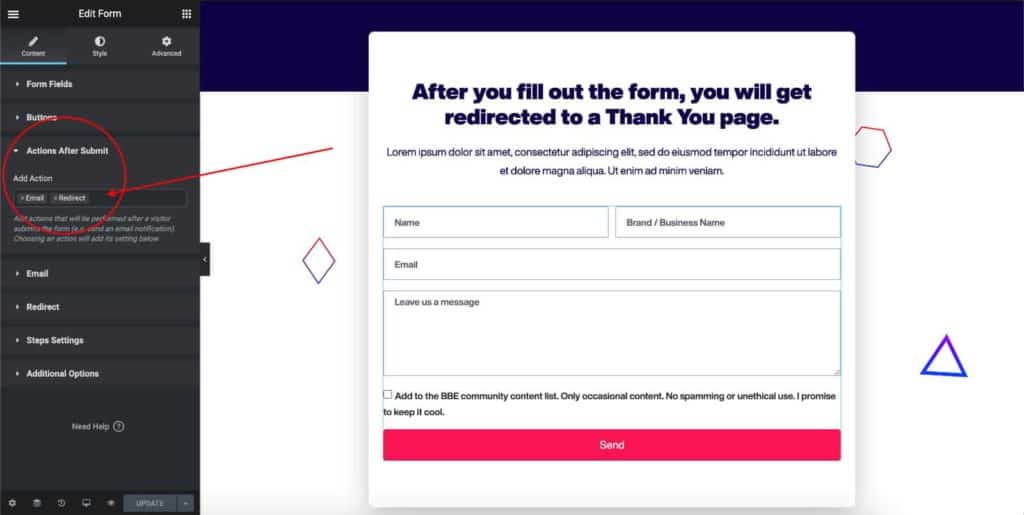
A new option will appear for Redirect with a box to add your Thank You page URL. It is important to add your full URL here, including the ‘https://, ‘ or it will not work.
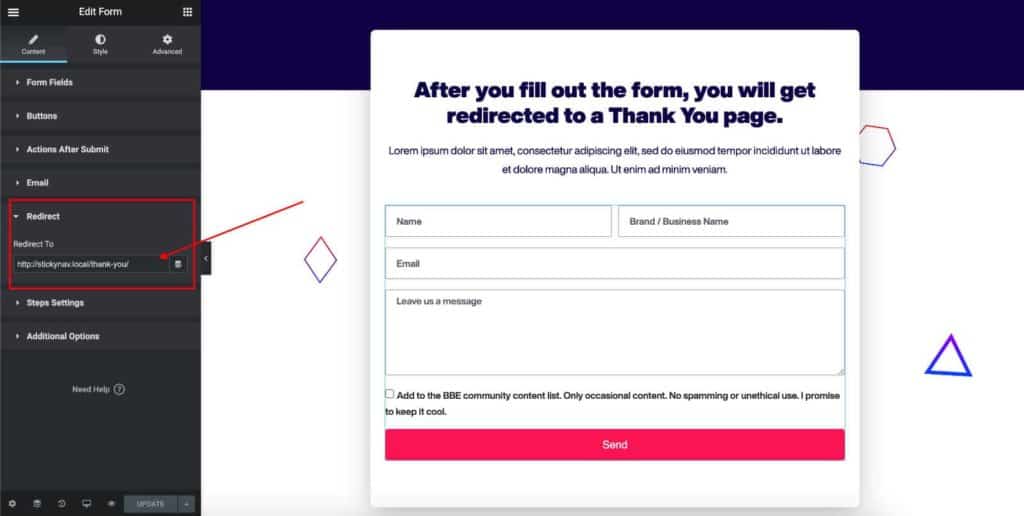
That is it. Your form will now redirect your website visitors to the Thank You page. Go ahead and test it to make sure it works.
Why a Thank You Page Redirect is Important
1. Better UX
There are several benefits to using a Thank You page for your website visitors that take the time to fill out your forms. First, it improves the overall user experience. It adds a personal touch and makes you stand out from a majority of websites.
2. Improves Accessibility
Another benefit is the usability and accessibility improvements. Have you ever wondered if your submission actually went through? Sometimes the text is too small, or there is no indication that stands out, letting the user know the form was successfully sent. With the Thank You page redirect, there is no mistaking that the action was successful.
3. Great for Marketing
And finally, the benefits of marketing. When using Google Tag Manager, you can create events for users that reach the thank you page. With Facebook pixel, you can use retargeting. From a marketing perspective, there are many benefits of utilizing Thank You page redirections.
Should I Use Thank You Page Redirect?
If you are using Elementor, there is no reason not to thank your website visitors that fill out your forms. It literally takes just minutes to set up and packs a far better user experience.
I hope this article helps. Make sure to subscribe below to get notified of more web design and Elementor-related content and useful tips. And check out my video below to help easily walk you through Elementor forms and don’t forget to subscribe! Your support is appreciated.

