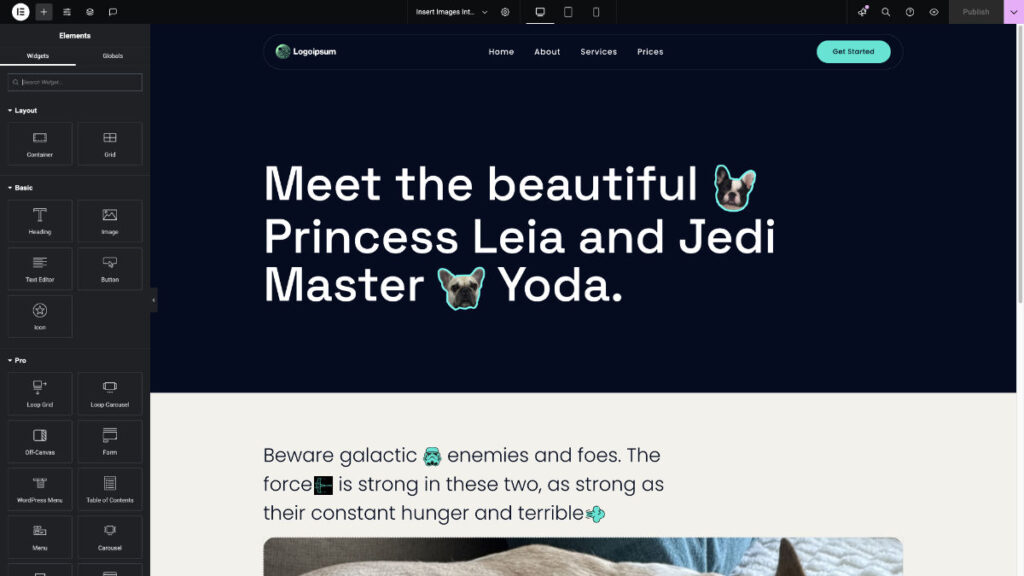
This tutorial will teach you how to use CSS to seamlessly insert images into your text, giving your designs a fresh and standout look. Let’s jump right in!
What Is ‘Image in Text’?
We’ll use CSS in the middle of our text or headers and insert and image. Think of it like adding a custom emoji. This effect works perfectly for grabbing attention and adding creativity to headings or body text.
Our example shows this in Elementor (the video is also using Elementor) but the same exact can be done using any page builder including Bricks, Breakdance, Divi, and even Gutenberg.

Why & When To Use This Effect?
Sometimes text alone can look boring. Adding small images into text can:
- Make your design more engaging
- Help emphasize specific parts of the text
- Stand out in your content design
Let’s get started! For this tutorial, we’ll use Elementor as an example, but this technique works with any page builder like Bricks or Breakdance, and even plain HTML.
Steps to Insert Images Into Text With CSS In WordPress (any page builder!)
Step 1: Add the CSS Snippet
Next, apply the following CSS to style the span tags with your chosen images. The CSS has been prepared for up to 5 different images. Just like the span, only copy and paste the ones you are using. If any of this is confusing, then watch the video at the end. It’ll all make sense there.
/* CSS Snippet - image #1 */
.insert-image-1 {
   display: inline-block;
    background-image: url("add image url");
    background-repeat: no-repeat;
    background-position: center center;
    background-size: contain;
    width: 1em;
    height: 1em;
    line-height: 1;
    vertical-align: middle;
    overflow: hidden;
}

/* CSS Snippet - image #2 */
.insert-image-2 {
   display: inline-block;
    background-image: url("add image url");
    background-repeat: no-repeat;
    background-position: center center;
    background-size: contain;
    width: 1em;
    height: 1em;
    line-height: 1;
    vertical-align: middle;
    overflow: hidden;
}

/* CSS Snippet - image #3 */
.insert-image-3 {
   display: inline-block;
    background-image: url("add image url");
    background-repeat: no-repeat;
    background-position: center center;
    background-size: contain;
    width: 1em;
    height: 1em;
    line-height: 1;
    vertical-align: middle;
    overflow: hidden;
}

/* CSS Snippet - image #4 */
.insert-image-4 {
   display: inline-block;
    background-image: url("add image url");
    background-repeat: no-repeat;
    background-position: center center;
    background-size: contain;
    width: 1em;
    height: 1em;
    line-height: 1;
    vertical-align: middle;
    overflow: hidden;
}

/* CSS Snippet - image #5 */
.insert-image-5 {
   display: inline-block;
    background-image: url("add image url");
    background-repeat: no-repeat;
    background-position: center center;
    background-size: contain;
    width: 1em;
    height: 1em;
    line-height: 1;
    vertical-align: middle;
    overflow: hidden;
}
Step 2: Add the Span Tag
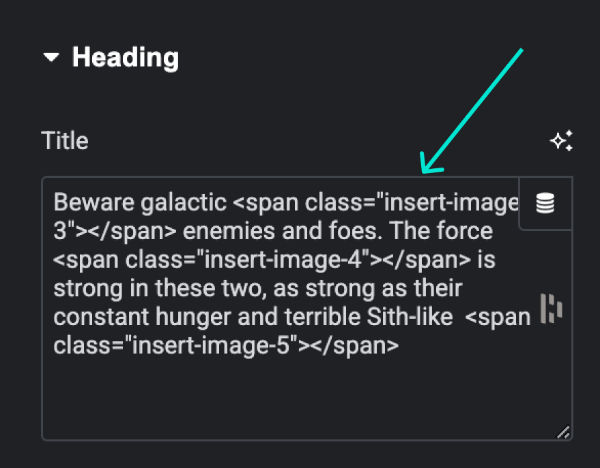
In the text editor of your choice, insert the following span tag into your text where you want the images to appear. Here’s what it will look like:

Here’s the code for 5 different image options. If you are only use 1, then just copy and paste the first span and use the rest for additional images:
/* insert this snippet into text - image #1 */
<span class="insert-image-1" aria-label="description of the image"></span>

/* insert this snippet into text - image #2 */
<span class="insert-image-2" aria-label="description of the image"></span>

/* insert this snippet into text - image #3 */
<span class="insert-image-3" aria-label="description of the image"></span>

/* insert this snippet into text - image #4 */
<span class="insert-image-4" aria-label="description of the image"></span>

/* insert this snippet into text - image #5 */
<span class="insert-image-5" aria-label="description of the image"></span>
Step 3: Add the Images
Upload your images to WordPress > Media. Once uploaded, copy the image URL starting from /wp-content (e.g., /wp-content/uploads/your-image.jpg). This ensures compatibility even if your site is migrated.
Replace "add image url" in the CSS with your image URL.
Step 4: Update the Aria-Label
For accessibility, update the aria-label in your span tag with a description of the image. This improves usability for screen readers and keeps your site accessible to all users.
Final Step: Watch the Video
Check out the video below to see how to implement this step by step:


