
We can add an extra level of personalization to your WordPress website by customizing your Theme and adding your brand or your client’s brand when renaming your WordPress theme.
In this article, I will show you how to change the name of Elementor’s Hello Theme to add your own personalized name and brand.
Why Change the Elementor Theme Name
First, the pros and cons of changing the name of the Theme you are using. In particular renaming and changing Elementor’s Hello Theme.
The pro is that it looks more professional. Most high-level websites built with WordPress have their own name as the theme name. And when using the Hello theme, it is essentially a barebones theme without any prebuilt layouts, so you are practically building your Theme from scratch with Elementor.
Now the con, and I have to warn you, there is one big con. The updates do not automatically come up and have to be done manually. Whenever there is an update, you will have to repeat this process each time. The good news is, Hello Theme rarely has updates since it’s very close to being a blank theme.
Check the end of this article for steps to update the Hello Theme that has had the name changed.
What You Will Need For This Tutorial
You will need a text editor. I recommend either Sublime Text or VS Code. Both are free and easy to set up and are what I use.
You will also need to download the parent Hello Theme and Hello Child Theme. And note for the rest of this tutorial, I will regard the main theme as the parent theme, the child theme as the child theme. So here are links for everything:
Hello Theme – https://wordpress.org/themes/hello-elementor/
Hello Child Theme – https://github.com/elementor/hello-theme-child
Sublime Text – https://www.sublimetext.com/
VS Code – https://code.visualstudio.com/
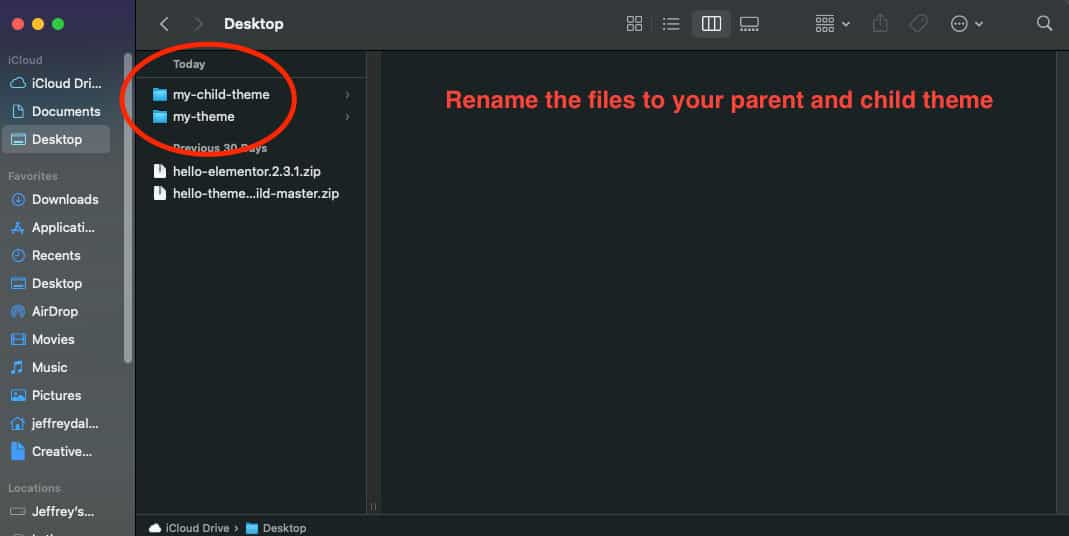
The First Step – Rename Elementor Hello Theme File
Open both of the zip files for your Hello theme and child theme.
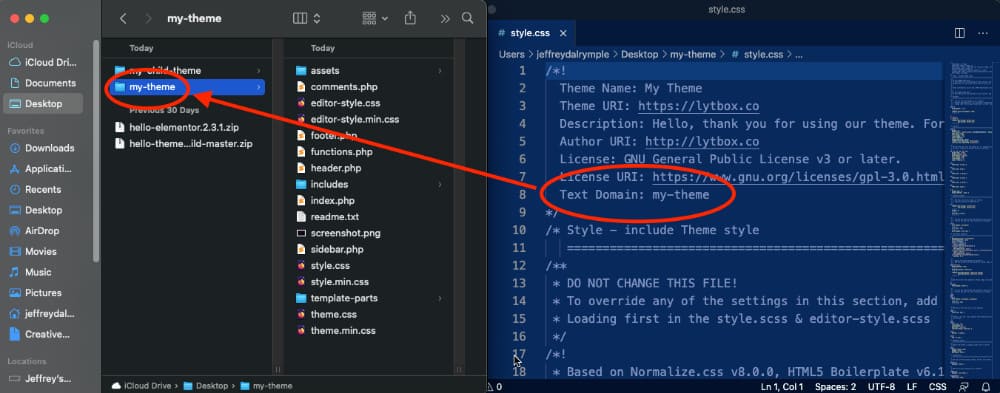
Next, rename the opened files to the name of your theme and child theme. Here is an example:
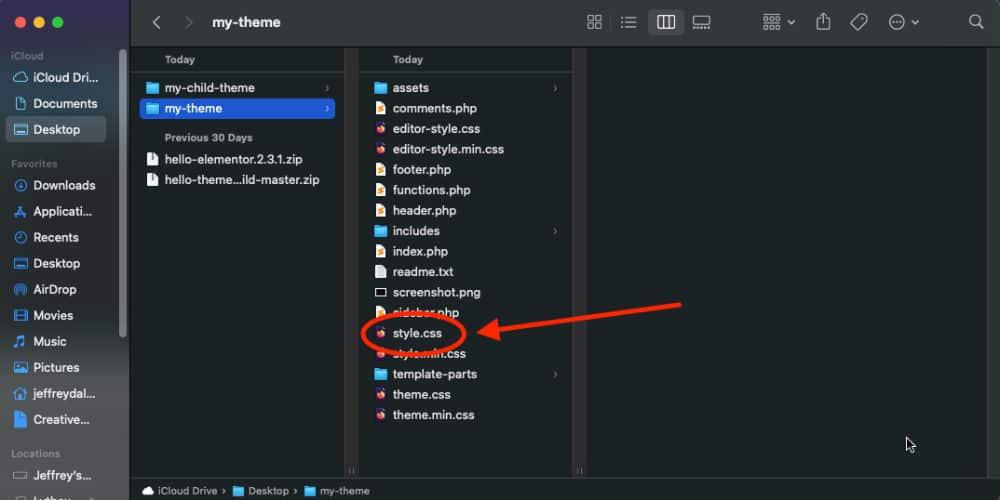
The Second Step – Change Elementor’s Hello Theme Name in the CSS File
Use your text editor to open up the style.css file that is on your parent theme. And if you are new to text editors, do not worry. You don’t have to be a coder to use. I’ll make this simple.
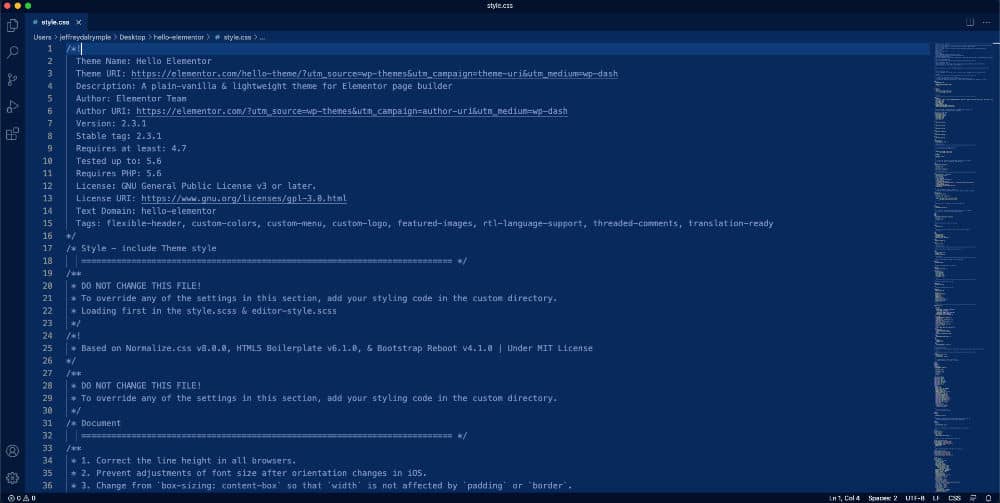
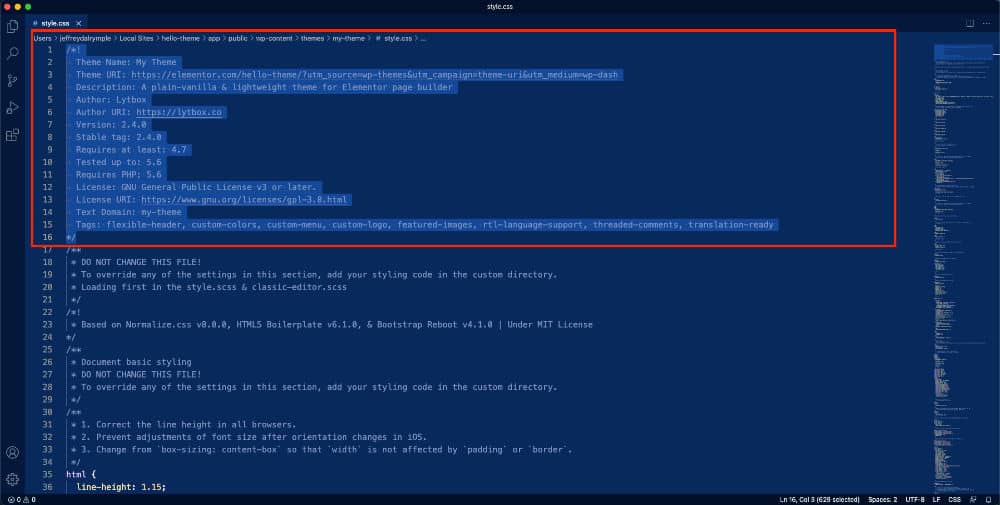
Your style.css file should look like this when opened:
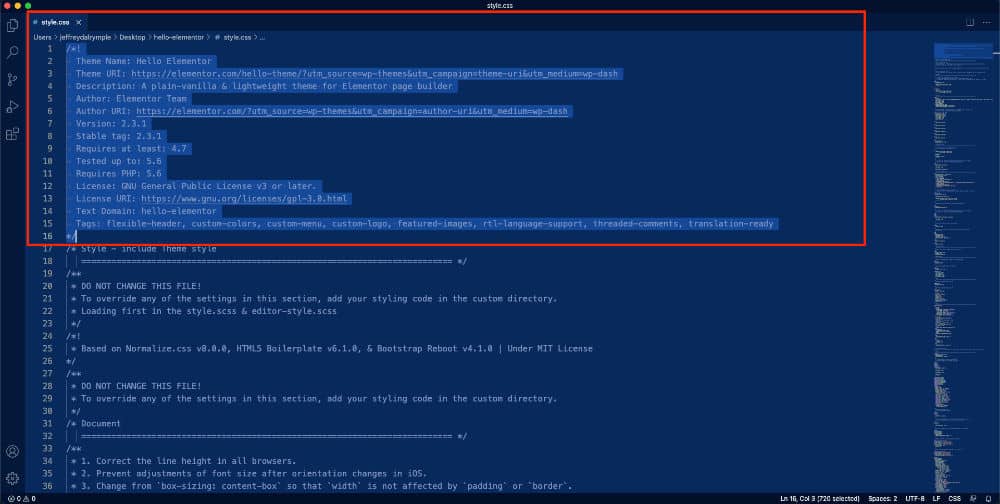
Editing the style.css File
We will only make a few edits to the top section of the file. The text between the /* and */ symbols are the comments that WordPress reads and adds as the theme’s name in the dashboard. Note the highlighted section in the image below for a reference of the area we are editing.
First-line to edit – “Theme Name”
Here you can give any name to your Theme. This is what will show in the backend of your WordPress website.
Second line to edit – “Theme URI”
Here you can leave it as is, or you can put your own website’s URL. This does not show on the website.
Third line to edit – “Description”
Here you can leave as is, or you can put a custom message here. This does show in the backend of the website. Personally, I like to put a message and leave my contact information, so anyone that uses the website in the future can reach me for questions.
Fourth line to edit – “Author”
You can leave or change to your own name. This will show on the back of the website.
Fifth line to edit – “Author URI”
This you can leave or change to your own website. It will show in the backend and be clickable. If you are going to add your own name and brand to the Author Name, it would be best to add your own URL here.
Next couple of lines – “Version, Stable Tags, Requires at Least, Tested Up To, Requires PHP, License, and License URI”
All of these can stay and do not show in the backend and make no difference to remove or change. I also would recommend always leaving the license.
Fifth line to edit – “Text Domain”
Now, this is important! The text domain must be identical to the file name. If you get an error when trying to upload, most of the time is because this line is not done right.
Here’s an image for reference:
The last line – “Tags”
You can leave or delete it up to you. I delete this row since it shows in the backend, and I like things to be clean.
Here is an example of how your parent theme should look like once it’s complete:
Next Step – Editing The style.css In Your Child Theme
This step is very similar to editing the parent theme with just one extra step.
Go through your child theme the same way as your parent theme and make the same edits.
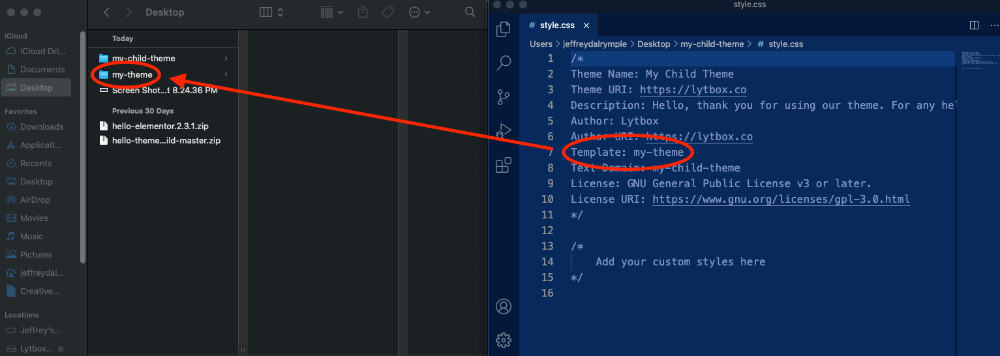
You will see an extra line called “Template.” This is super important. The template line is what connects your child theme to the parent theme. If you do not do this exactly right, you will get an error when uploading to WordPress.
To edit the template, add the name of your parent theme’s file exactly as is it in your files. See the image below for reference:
Adding Your Own Image to the Hello Theme
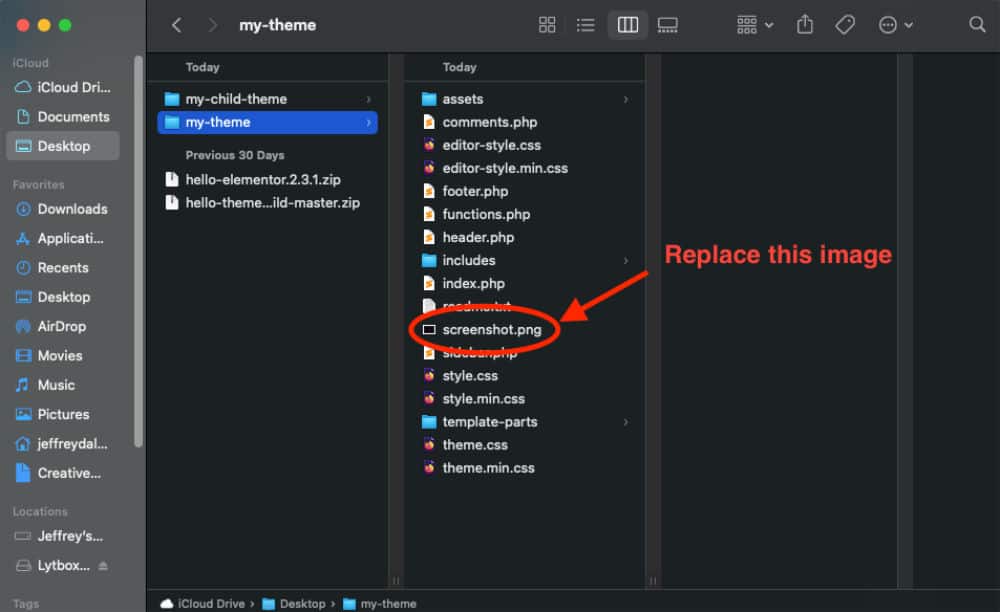
If you look at your themes in the backend of your WordPress website, you will notice a cover image. We can easily add our own that shows a higher level of customization and branding.
To change the image, locate the screenshot.png image in both your Parent theme and Child theme. And delete the theme.
Next, make your own images. You can add anything here. The only requirements:
- Your image must be named screenshot.png
- The size of your image must be 1200px width and 900px height.
Here is an image for reference of where you can find the Theme’s image:
Adding the Custom Themes to Your WordPress Website
This is the last step and super easy. Zip up both your custom Parent theme and Child theme and upload them like you nasally would. They should be good to go.
Updating the Hello Theme After Changing the Name
Unfortunately, when changing the name of the Hello there, you will no longer receive automated updates, and they will have to be done manually. Here are the steps to manually update the Hello Theme.
Step 1:
Make a backup! This is the most crucial step before going forward. If anything goes wrong here, you can revert back. Do not go forward with the following steps if you do not have a backup ready.
Step 2:
Download the updated parent Hello Theme.
Follow the steps above to customize again. You will have to repeat the process exactly as you did the first time on the updated version of the Theme.
You do not need to change your child theme. You can leave as is.
Step 3:
If you did any custom coding, you would need to copy to a text editor and transfer once the Theme is uploaded.
Check the Customizer to make sure if CSS is added, to copy and paste to a text editor.
Step 4:
Activate the Twenty-Twenty-One Theme or the most current WordPress default theme. Once that is activated, delete your custom parent theme. And leave your custom child theme alone.
Do not worry about losing data. Everything will still be there and stored in Elementor. And if anything looks off, you can always revert to your backup.
Step 5:
Upload your updated custom parent theme. And activate your child theme. With that, you should be good to go. If you get an error, check to ensure the names in Theme’s “Text-Domain” and “Template” are correct. Usually, errors are from incorrect spelling, spacing, and capitalization in those two lines.
The Wrap Up
I hope this helps. If you have any questions, drop them in the comments and subscribe to our newsletter to receive updates on web design-related content. Thanks!