
Do you want to send Autoresponds to users when they sign up for a newsletter, or fill up a form on your website? Well, you can do so by using the default elementor form widget, without the need for any additional plugins.
In this tutorial, you will learn how to set up autoresponder emails which are sent directly to the user’s submitted email address, immediately after the user fills up a form.
What is an Auto Responding email?
An Auto Responding email is an automated email sent to the user when the user takes certain actions, like submitting a form.
For example, when somebody fills up a contact form, an autoresponder email can be sent to the user, letting them know that we have received their email and will get back to them shortly.
Another use case could be when setting up email campaigns. We can ask somebody to sign up to get some free resources. When a user signs up, they get an automatic email response, with the link to download the resources they were promised. In addition to automation, this also helps verify the user’s email address.
Let us know in the comments if you have any ideas or use cases for Autoresponding emails.
1st Step: Enable “Email 2” in “Actions after Submit”
By default, under “Actions after submit” we have “Collect submissions” and “Email” enabled. This email refers to the email that the owner of the form/website receives when a user submits a form. However, we want to set an email that is sent to the user who fills up the form.
To do that, click on “Email 2” to enable a second email option. This will be the email that will be sent to the user.
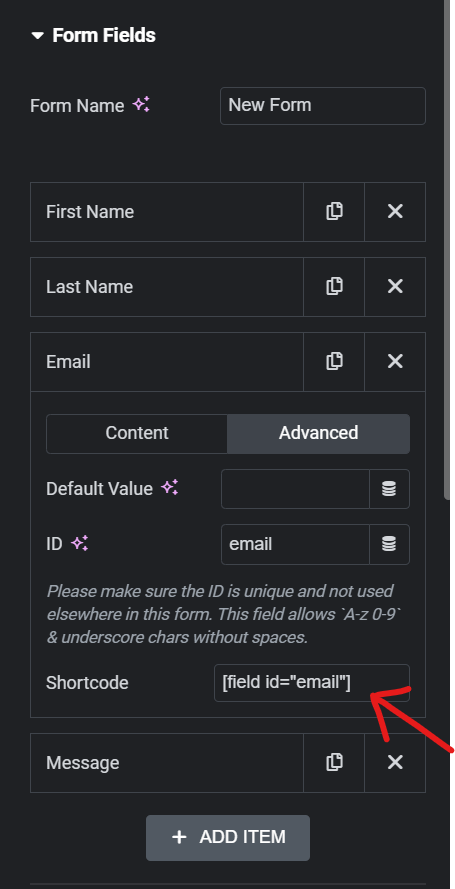
2nd Step: Copy the shortcode of the email field
To configure “Email 2” to send an auto-responding email to the user-submitted email address, we will need the shortcode of the email field of the form. Navigate to the form fields, go over to the email field, and open the “Advanced” tab. The shortcode for the email field can be found here. Copy this shortcode.
Optional: You can change the ID and hence the shortcode to something you want to use if required.
3rd Step: Configure “Email 2” to set up Auto Responding email
Navitage to “Email 2” and paste the shortcode in the “To” field. This will send the contents of “Email 2” to the email address submitted by the user.
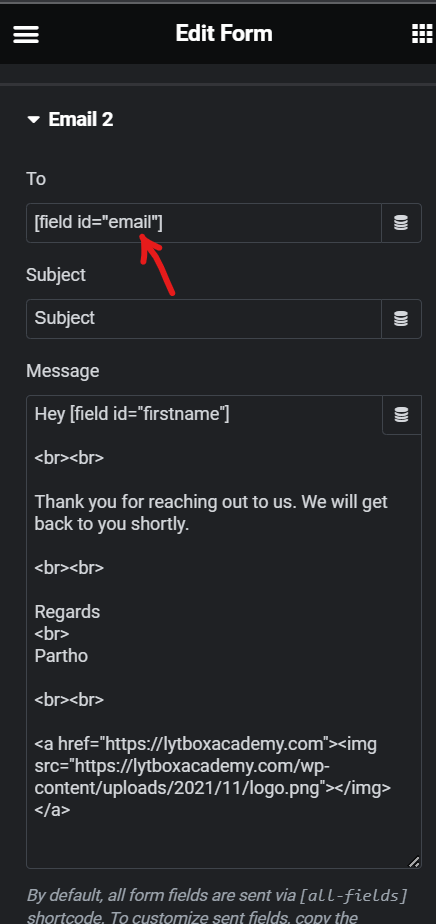
Go ahead and add a relevant subject, in the subject field. This will be the subject of the email that is sent to the user.
Next, in the “message” field, we have to set up the content of the email. By default, it is set to [all-fields], however, this shortcode will simply send all the fields submitted by the user, which is not what we want. Hence we have to delete the shortcode and add our personalised email.
We can start by greeting the user, by using the shortcode of the “First Name” field of the form (provided there is one). Again, navigate to form fields and go to the “Advanced” tab of the “First Name” field, to copy the shortcode.
Next, paste the shortcode, right after an appropriate salutation, for example, Hey {shortcode}.
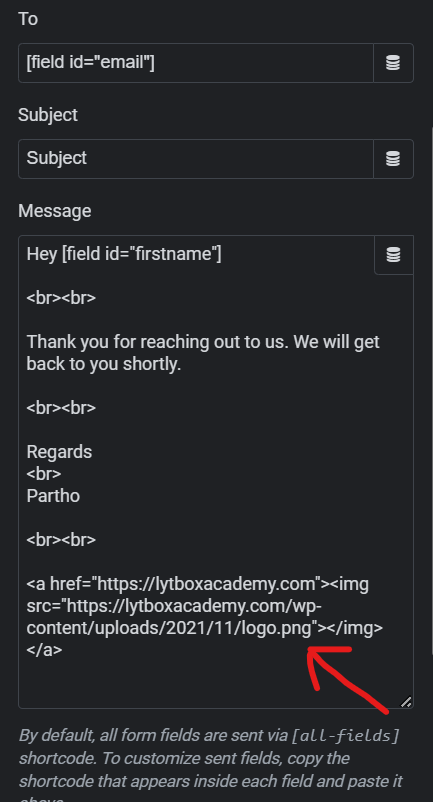
4th Step: Add content to the email
By default, the emails in elementor form are set to “HTML“, which means we have to use HTML tags for changing paragraphs. Therefore, we have to add a <br> tag after the salutation to change the paragraph. To add an empty line between the content and the salutation, use two consecutive <br> tags.
Test it out to see what works for you :)
Now, paste the content of the email that you want to send to the user, followed by <br> tags to add spacing right before you add your signature.
You can also add your logo, linked to your website. To do that, add a <img> tag to display your logo, for example: <img src=”{link to your logo}”>. To add a link to your site, put this image tag inside a <a> tag, for example: <a href=”{link to your site}”><img src=”{link to your logo}”></img></a>
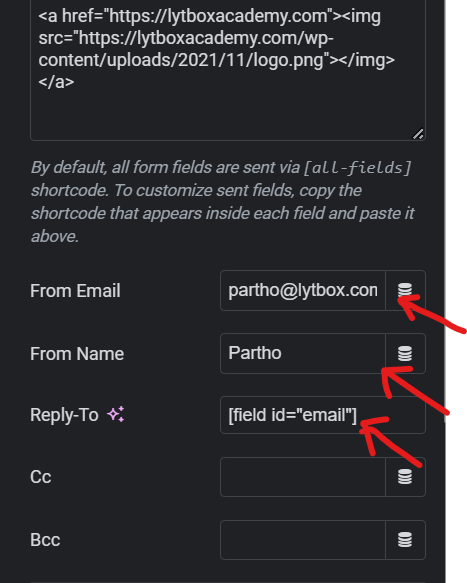
Last Step: Finishing up
Last, but not least, we have to fill up the “From Email“, “From Name” and “Reply-to” fields. Set your email as the “From Email“, your name as “From Name” and again, your email in the “Reply-to” field. That way, if the user decides to reply to the Auto Responding email, the reply email will be sent to your email address.
Here is the template for the HTML email that we created:
Hey {Shortcode for first name}

<br><br>

{Your custom message}

<br><br>

Regards
<br>
{Your name}

<br><br>

<a href="Link to your website"><img src="Link to your website logo"></img></a>
How to set up a sign-up campaign using Auto Responding email?
If you want to set up an email campaign, where you provide free downloadable resources when the user signs up using their email, you can do so using an Auto Responding email.
All you have to do is add a link to the free downloadable resource to the content of your Auto Responding email.
Go ahead and copy the link to your resource and add it to the “message” field, but using <a> tag.
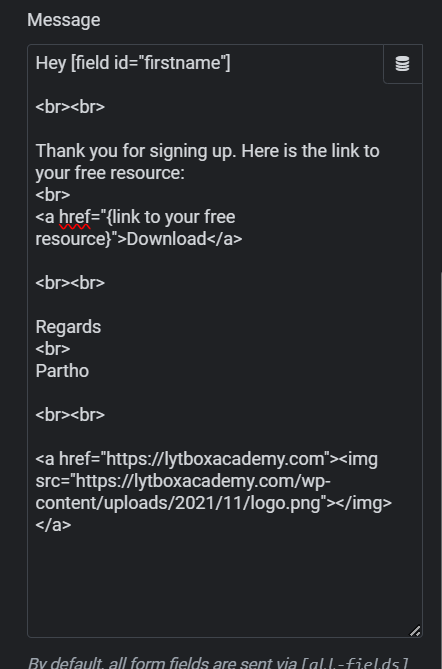
Here is the template for the HTML email that we created:
Hey {Shortcode for first name}

<br><br>

Thank you for signing up. Here is the link to your free resource:
<br>
<a href="{link to your free resource}">Download</a>

<br><br>

Regards
<br>
{Your name}

<br><br>

<a href="{Link to your website}"><img src="{Link to your website logo}"></a>
Conclusion
Auto Responding emails can be used for a variety of situations and use cases. We can set up Aut Responding emails using the default elementor widget, without using any additional plugins or code. Let us know what use cases you plan to implement Auto Responding emails to.
Here is a video tutorial for guided instructions