
What is a WordPress & Elementor Blueprint website?
A Blueprint website is a pre-configured site set up as a staging site and ready to clone. It includes all the essential elements and configurations needed to speed up the web-building process.
For Elementor and WordPress, this includes the Elementor setup as well as WordPress and plugin stack setup. The goal is to do it once and cut out the repeatable and tedious work we do when starting a new website build.
Why should you use a Blueprint site?
Using a Blueprint site saves time and effort by providing a ready-to-go framework for website development. It streamlines the setup process and ensures consistency across multiple projects.
Whenever we find ourselves doing the same tasks over and over, there is an opportunity for automation. A blueprint website for Elementor and WordPress automates the start-up process of a new website.
How to create an Elementor Blueprint site.
It takes you anywhere from 1-3 hours to complete one. The goal is to identify the tasks you do whenever set up a new website and complete those tasks just 1 time on your Blueprint website. This includes choosing your staging environment, setting up WordPress, going through your Elementor settings, setting up Elementor’s global styles, and adding your WordPress plugin stack.
I’ll take you through each one of these steps and to make things easier, I’ve added a video below showing you my setup process.
Step 1: Select a staging environment to host your Elementor blueprint website.
An important step, is we need to host our staging site somewhere that is easy to clone and get started. There are a few really good options that include blueprint and staging features. Here are my recommendations:
- Local WP: Better known as Local by Flywheel. This is a great free option that includes a blueprint feature. The only downside is that it’s a local host and not a live website so you will need to migrate your blueprint site to a live server. Still, it’s free and a tool I’ve used for years.
- InstaWP: InstaWP is built for blueprints and starter sites. It’s the tool I’ve switched to and use now for my hosting. It’s not free but it saves so much time. If you value your time and want to really streamline your workflow, then InstaWP is the way to go.
- Hosting that includes cloning and staging. Good hosting providers will include options to clone a site in 1 click. I personally use RunCloud and Cloudways and both offer this option.
Step 2: Setting up WordPress
After you have your provider selected, spin up your blueprint WordPress site.
Go through all of your WordPress settings and add your theme. Take Tim to leave no stone unturned while going through your settings so you don’t have to do this again later.
Every site has the same basic pages, home, blog, contact, etc. Add your default pages and create a default menu. Also, don’t forget to navigate to appearance > customize and complete those settings.
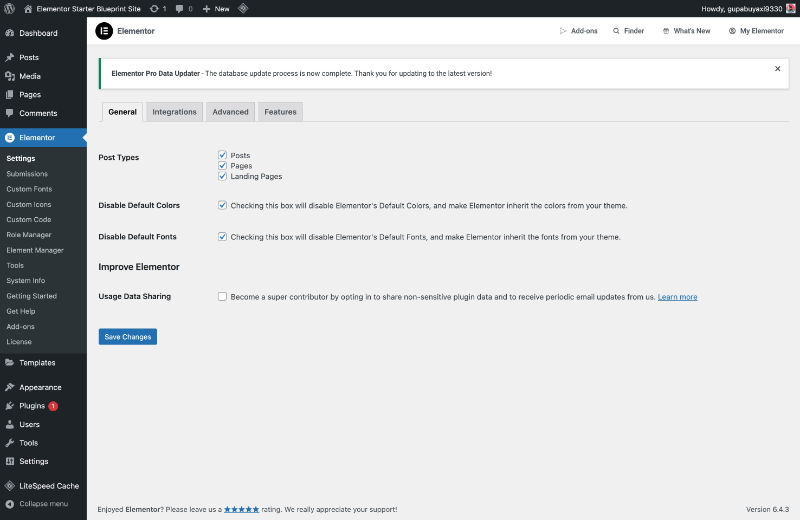
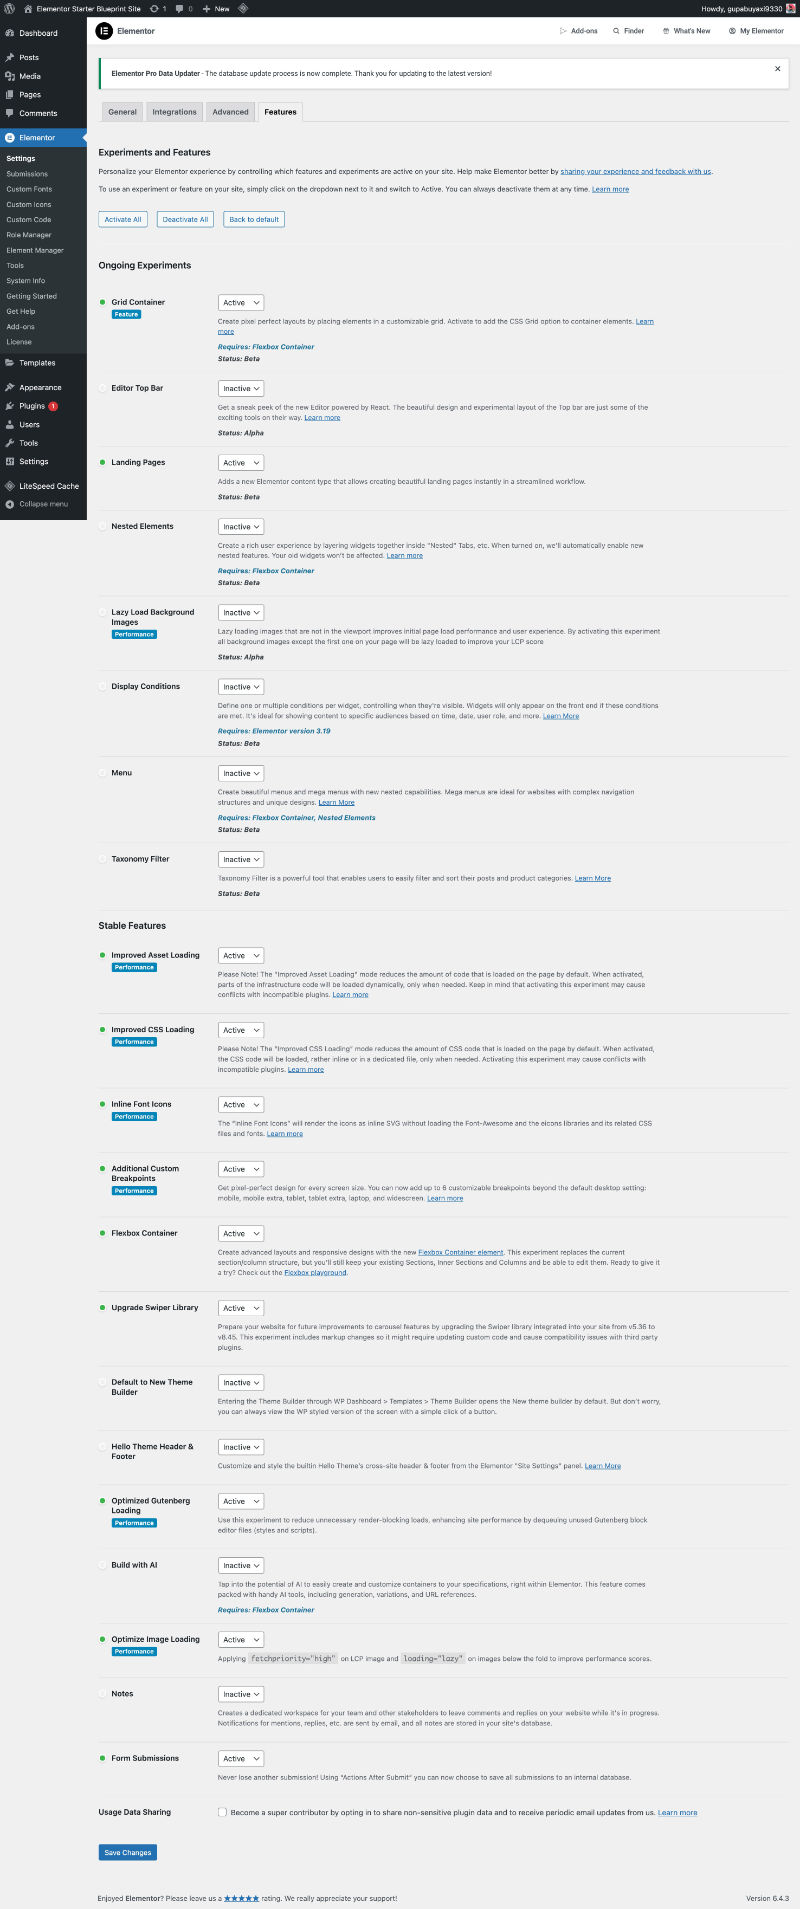
Step 3: Optimizing Elementor’s Settings
Install Elementor and Elementor Pro and go through all your settings in the backend. Navigate to Elementor settings in your dashboard and go through each option. Here are a few screenshots of my Elementor settings:
You can also create a starter Header, Footer, Single, and Article template to help speed up your process.
Step 4: Setting up Elementor Globals
After completing your Elementor dashboard settings, next we need to set up our front-end settings. Go to your homepage, edit with Elementor, navigate to the top left icon, and choose Site Settings.
Start by going through your settings and set them up the way you normally set up your Elementor site.
You can update the Theme Styles if that is part of your workflow. Personally, I never use these. I find they conflict with my Globals but that’s because of my workflow style. Do what’s right for your workflow style.
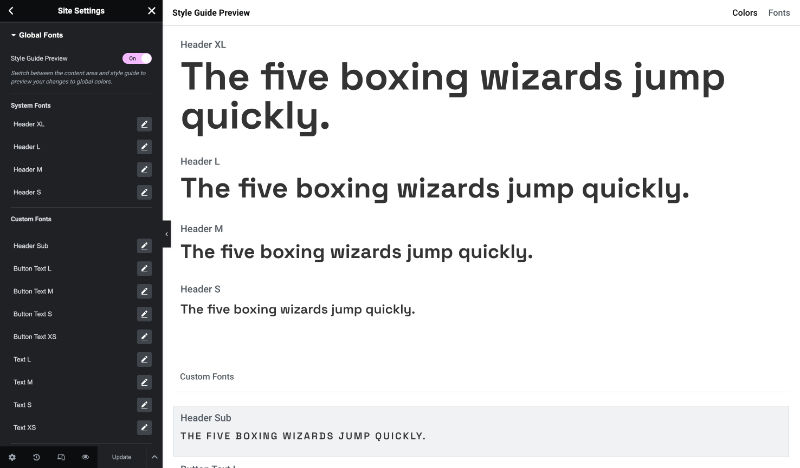
Next, spend time setting up your global colors and global fonts. These change on each project. The goal here is to have it all ready to add your site’s brand colors and font styles.
Most of my font styles stay the same with small changes and different fonts. It’s this part of the setup process I find takes the most time. Set it up so it’s ready to make minor changes. You can also add a starter font in your custom fonts to help with the setup.
Here are screenshots of my Globals setup.

Step 5: Adding your WordPress plugin stack
What plugins do you add to all of your sites? Security, performance, and SEO plugins are needed on all sites. Are there others you always use? Add them now to your blueprint site and set them up. You can then deactivate it so your build is lighter and faster.